Showing posts with label Before and After. Show all posts

Thursday, December 15, 2011

Before & After Basement Redesign

Remember this post: whimsical modern
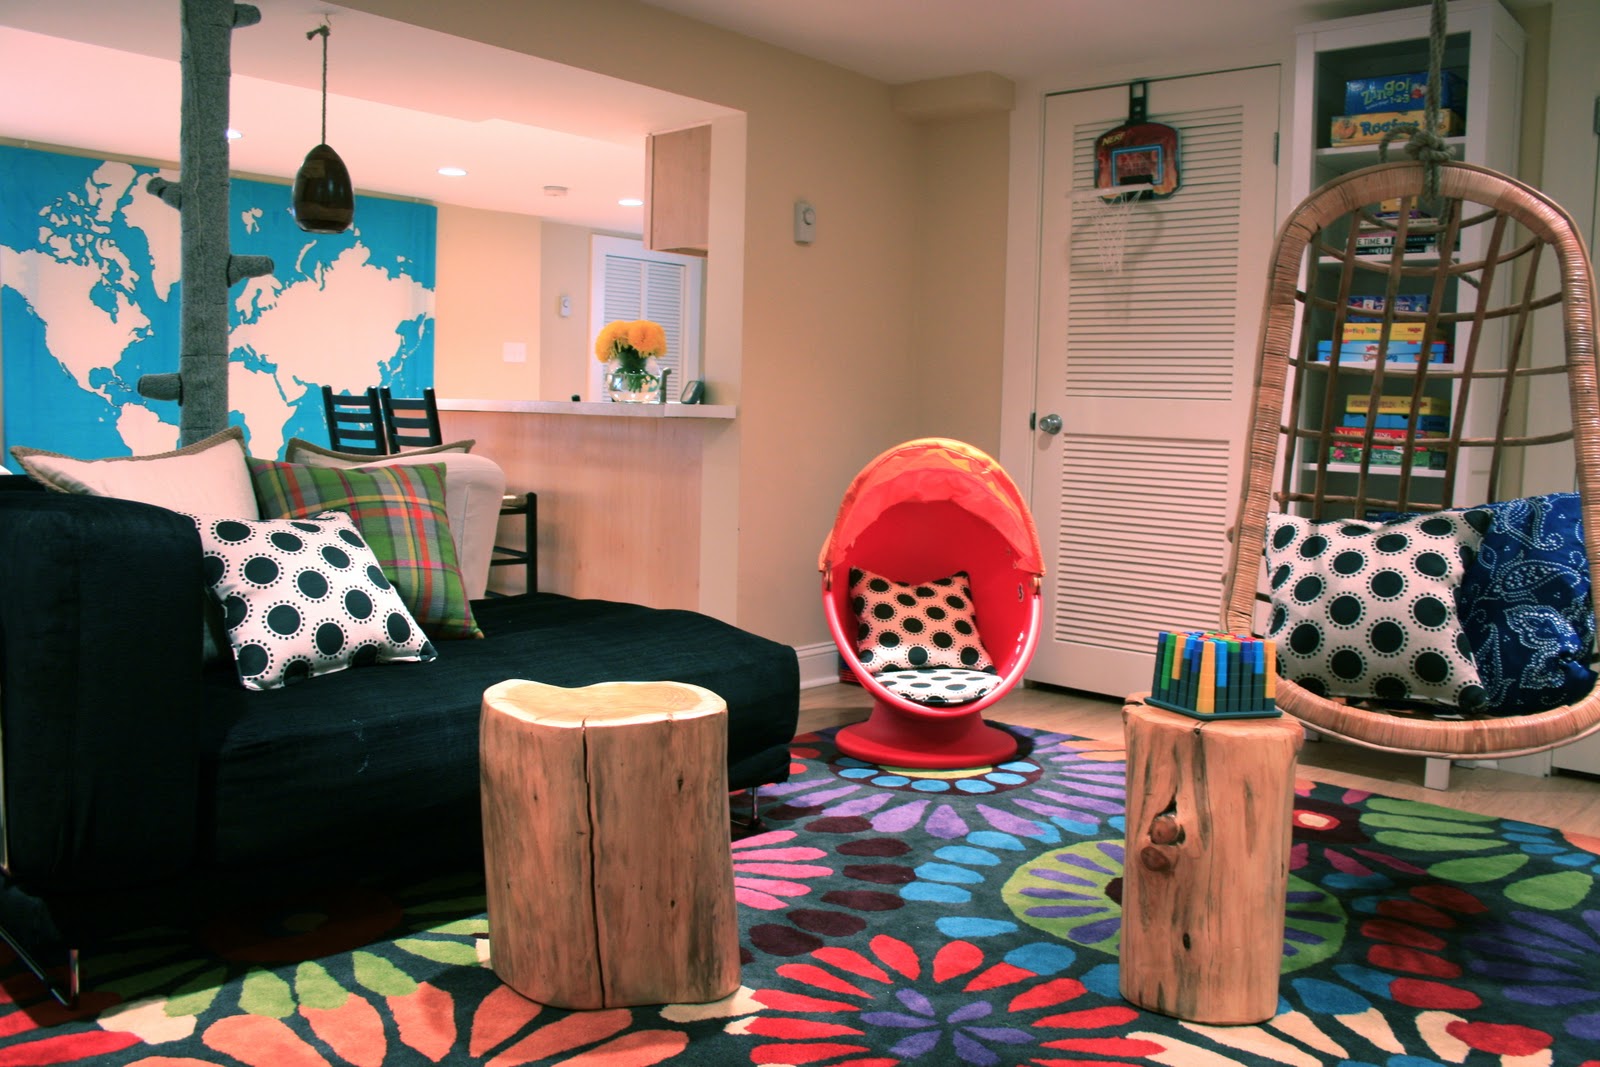
One of my recently completed projects was furnishing an entire basement living room.  The client had already made great use of the footprint by incorporating extra closets, a kitchenette, and a full bath. This new layout really put the "F" in function for the family of 6, however, there was no cohesive design scheme to keep organized on a daily basis.  The homeowner wanted this to be primarily a kid space for games, TV, art and crafts, but she also wanted to be able to entertain adults as well.  The jumping off point for the space were the Ikea blue and red kids chairs. Since it is a basement where natural light is limited,  I wanted to incorporate bright colors, graphic patterns and a sense of whimsy to the space. 


Before:

After:


The new layout separates the space into two zones.  The first zone above incorporates plush slipcovered chairs for easy cleaning for the adults to sit, read, or entertain.  We even incorporated a cozy little electric fireplace for added ambiance.  I also included two red vintage industrial chairs for extra seating or for using with the folding desks.


The second zone is the kid zone.  This area includes a rattan hanging chair, a chaise lounge, and the original Ikea blue and red kid chairs with customized cushions to play games, or watch movies.   To maximize floor space for the kids toys, I selected two wood stump side tables as opposed to a larger coffee table.


Did you spy the concealed support pole separating the two spaces?  We figured out a really fun and creative way to hide this, and I will dedicate a whole post next week to who, what, and how we made this eyesore a fun part of the design!


Monday, August 29, 2011

LilSugar.com

I was thrilled to hear LilSugar.com wanted to feature my son's chalkboard table  project on their website! If you don't know about LilSugar.com, I highly recommend visiting it from time to time.  It's chalkfull (no pun intended) of great information on home, fashion, parenthood, and everything in between!

Check out the article here:


Friday, April 8, 2011

Before & After

One of the things I love to do - as most creative types probably do- is finding unwanted furniture and breathing fresh life into them.  I don't have a whole lot of time or space for that matter to really collect as much as I would want, but I do have some pieces that I will try to complete in the warmer months ahead.    I will be posting these projects from time to time as I finish them. I hope to inspire others from discarding otherwise good pieces of furniture if all they really need is a good coat of paint or new upholstery.    


I'm kicking this off with one of the first pieces I refurbished.  The before pic is actually mid process- tan brown wood stain and the ugly peach velour upholstery aren't shown, but you can still get a great idea of the change made.  I actually toyed with the idea of leaving the wood stripped as shown in the "before" and upholstering the seat with a light colored, linen fabric, but I love injecting some good old vibrant personality into occasional chairs.   The floral fabric is from Anthropologie, but is not longer available.  Yes, its not well advertised, but you can buy cut yardage from select Anthropologie stores!  


BEFORE


And the after......


Thursday, January 6, 2011

Client Dining Room

A couple weeks ago I posted about a dining room I was working on.  We designed a custom console table to fill in a very large blank wall.  So large in fact, that if I selected a table to fit the wall proportionate to the size, it would have dwarfed the dining table by comparison.  The solution was adding some architecture to the room to fill in the space by way of picture frame molding and crown molding.

In every design,  there is a jumping off point.  For my client, it was the fabric I selected to reupholster her dining chair seats (and two new upholstered dining end chairs which will carry the fabric at eye level for more visibility, but they are still being made as we speak).  The fabric is from Calico Corners called Kaiya Shiki.  I'm not sure I've ever had so many people comment on how much they love this fabric.  Everytime I pulled the swatch out at a store, someone would say "oh, love that fabric".   

From there we selected the paint color using the fabric swatch as guidance.  We ended up going with a saturated clay color call Sienna Clay from Benjamin Moore.  

This dining room connects directly to the kitchen which we are also in the middle of updating and redesigning.  In the kitchen we selected bold blue and white damask window treatments, along with a gray/aqua/dark-blue glass backsplash. To tie the two rooms together, I choose a rich azure blue as the accent color for the dining room.  

The draperies are a solid bronze color so they don't compete too much with the kitchen fabric, but I did throw in a hint of pattern with the blue greek key banding on the edges of the drapes. (squint hard and you might see the color and pattern in the picture!)

 Here are the before pics, although the room was painted Sienna Clay by this point, so I don't have the original yellow walls to show you. 


Here are the after shots:


Monday, November 15, 2010

I Heart My New Stationery

Some of you may have noticed the slightest change in my logo- I recently had the very talented Tara Hogan of Ink & Wit do some beautiful letterpress business notecards for me....one thing lead to another and I ended up having her tweak my logo as well.  It was just feeling a little too busy for me, and I really wanted to refine things a bit- my old logo had a bit too much going on.  I couldn't be happier with the result, and I can't wait to deplete my remaining business cards for something a little more tactile.  

Tuesday, April 13, 2010

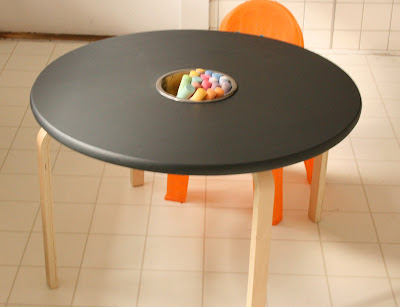
Liam's Offi-like table

Finally, I'm happy to post these after pictures of Liam's new modern craft/dining table, and I've included the before picture again since its been a few weeks. I will say he eats at it more than he crafts at it, but I couldn't be happier with the FINAL product. I actually went through a process of sanding it down three different times and applying the chalkboard paint after each time to get a nice smooth finish. I have found some Ikea childrens chairs that I think will work well with the table, and plan to purchase them soon. See them here.

Inspiration:


Before/After


Friday, March 26, 2010

Offi Woody Chalkboard Table

I have just about completed a table for my 2 year old son. I have been feasting my eyes on the OFFI Woody chalkboard table since I first spotted it in a feature Domino Magazine did on Barrie Benson's home way back in 2007. However, I did not want to spend the $400 just on the table plus chairs, so I have been keeping my fingers crossed that I would find that table for less eventually. Just my luck when my neighbor was throwing out the side table shown below on garbage day.
I immediately saw its future life as Liam's table. I cut a hole out the middle of the table and inserted a stainless steel mixing bowl I found at Home Goods.......now comes the paint and new legs!

Stay tuned for the after photo........


Monday, July 20, 2009

Foyer Update


A year after moving into our place, and 11 months after putting down the paint cans I'm once again going on a home improvement binge.....it hits me about every 6 months. This time of course, I'll be documenting the changes for all to see!
I hope to show people that even designers don't always have a perfect home- do I dare say its like the Cobbler who's kids don't have shoes? Well, maybe not quite, but my place is a work in progress like most people.

This is for the many friends and aquaintances who've apologized to me about the state of their home before I've even stepped inside....and to show you what you can do to make your place better even if you are a renter like us.

So my foyer is a cream and brown disaster. I need color! Lucky for us, our landlord said it was okay to paint the walls (probably because the apartment hasn't seen a coat of paint in 10 years). In return, I promised to choose colors that would be fairly neutral....but this place is about a neutral as one can get, so some necessary color is in order.

Stay tuned for the after which is almost complete.